WebAuthn Walkthrough for iOS
This is a walkthrough of the iOS client-side implementation of WebAuthn using the Yubico YubiKit Demo included with the Yubico iOS SDK.
There are really two parts to WebAuthn, 1. The communication between the client (native iOS application or web browser) and the server as described by the WebAuthn specifications and 2. The communication between the client (native iOS application or web browser) and the authenticator (e.g. YubiKey 5Ci) as described by the CTAP2 protocol (Client-To Authenticator Protocol version 2).
This article provides a walkthrough of the communication between a native iOS app and a YubiKey 5Ci key as our authenticator plugged into an iPhone via the Apple Lightning connector.
WebAuthn
The Web Authentication API (WebAuthn) enables strong first factor (passwordless) and multi-factor authentication built on public key cryptography using hardware devices like security keys, mobile phones, and other devices with built-in authenticators. Learn more here.
WebAuthn/FIDO2 Flow
The WebAuthn (Web Authentication API) flow can be separated into two main parts, registration and authentication. I’ll cover each part and dive into the iOS Swift functions responsible for handling this flow, which involves talking to the YubiKey and the WebAuthn server.
In a password-based user registration flow, a server will typically present a form to a user asking for a username and password. The username/password would be sent to the server for storage and the password becomes the user credential. In WebAuthn, a server still binds a user to a credential, but this credential is known as a private-public keypair.
In the WebAuthn scenario, instead of asking for a username and password, the registration process involves the server, also known as a “Relying Party” (RP), asking the user to create a new keypair as the WebAuthn credential.
YubiKitManager
Before we get started with Registration and Authentication, it’s important to know about the YubiKitManager and Key Sessions within YubiKit for iOS.
YubiKit (the Yubico SDK for iOS that the demo app is using) provides the majority of its functionality through a single instance called YubiKitManager which is retrieved by accessing the YubiKitManager.shared property. YubiKitManager is a singleton structured to provide a list of connections, each one of them being dedicated to only one type of session. For example, in the FIDO2 scenario, we’ll be dealing with accessoryConnection for tracking the state of the connection with the YubiKey, and YKFFIDO2SessionKeyState for tracking the state of FIDO2 implementation (idle, processingRequest, and touchKey).
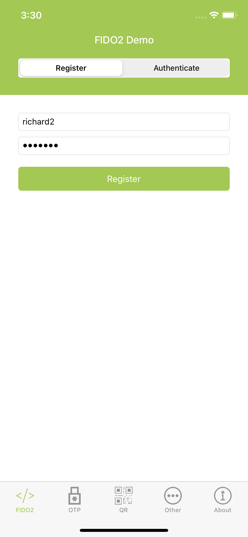
Registration
Use Case: The user wants to create a new account with organization X via their mobile app.
Remember earlier, we talked about using WebAuthn for passwordless or multi-factor authentication? In the demo app, we’ll be sending a username + password to create a new account and using the WebAuthn API server (defaults to https://demo.yubico.com) to set up multi-factor authentication using our security key.
Using the Demo App, YubiKit provides the FIDO2 support through a single shared instance of YKFFIDO2Session (of type YKFSession). The YKFFIDO2Session will receive requests and dispatch asynchronous calls to the YubiKey.
All the action starts in the FIDO2ViewController.swift class and the entire registration phase spans three functions: beginWebAuthnRegistration, makeCredentialOnKey, and finalizeWebAuthnRegistration.
#1 Begin Registration
User wants to create (aka “Register”) a new account with organization X using basic auth (username/password).
Check out beginWebAuthnRegistration()
#2 Make Credentials
This is the callback function (from Begin Registration) that handles the response data (as an BeginWebAuthnRegistrationResponse object) received from the authentication WebAuthn RP server. The object contains a challenge, information about the user, the Relying Party ID, desired type of credential, the authenticator selection criteria,and attestation preference.
The makeCredentialOnKey function takes the BeginWebAuthnRegistrationResponse object and executes makeCredential on the YubiKey.
Checkout makeCredentialOnKey(…)
#3 Finalize Registration
In this step, we send back the YubiKey credential object MakeCredentialOnKeyRegistrationResponse as an Attestation Object to the WebAuthn server for validation. The attestation object contains both authenticator data and an attestation statement.
Checkout finalizeWebAuthnRegistration(…)
At this point, the iOS user has basic auth (username + password) and WebAuthn credentials as a form of 2FA and can authenticate with the authentication server using username + password + FIDO2 as a form of two-factor authentication.
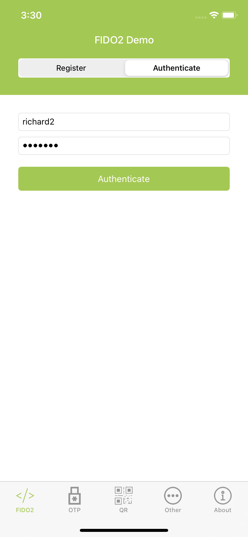
Authentication
Use Case: The same user wants to authenticate with basic auth (username + password) and use their registered YubiKey (we registered this YubiKey in the previous Registration phase) for multi-factor authentication.
Again, we’ll follow along with the Demo app provided by the YubiKit for iOS.
All the action remains in the FIDO2ViewController.swift class and the entire authentication phase also spans three functions: Begin Authentication, Assert on Key, and Finalize Authentication.
#1 Begin Authentication
This step performs basic authentication (username + password) for the user to authenticate with organization X via their iOS app. No keySession state or FIDO2 service for this method as it’s simply doing basic auth.
Checkout beginWebAuthnAuthentication(…)
#2 Assert on Key
This function handles the challenge response from the WebAuthn server
after the user successfully authenticated with their username
password.
During FIDO2 authentication, the user now needs to prove that they own the private key they registered by providing an assertion, which is retrieved from the YubiKey.
This function assertOnKey is responsible for getting the Assertion request BeginWebAuthnAuthenticationResponse (as a PublicKeyCredentialRequestOptions) provided by the WebAuthn server. The BeginWebAuthnAuthenticationResponse contains a [challenge], [allowedCredentials], and a [timeout].
The function then builds a getAssertionWithClientDataHash based on the BeginWebAuthnAuthenticationResponse and calls AssertOnKeyAuthenticationResponse to retrieve the credential.
Checkout assertOnKey(…)
#3 Finalize Authentication
This function finalizeWebAuthnAuthentication is the callback function based on the response from the YubiKey and passes those results to the WebAuthn server for validation.
Checkout finalizeWebAuthnAuthentication(…)
Once the server responds OK, we are now authenticated.
Final Thoughts
In addition to the registration and authentication functionality, the demo also provides examples for handling PIN verification when user verification is required during registration or authentication.
I hope this provides a good starting point for you to implement WebAuthn on iOS for multi-factor authentication.