Register using only Face ID
In this section we are going to walk through implementing an experience where a user is required to use Face ID to register a WebAuthn credential to their account. While it is best practice to be highly permissive in the types of authenticators you allow in your application, there may be instances where you want to only permit the use of a platform authenticator.
Note that this implementation guide will work for any flavor of platform authenticator across different devices. The Face ID nomenclature is used as it is the primary platform authenticator present on iOS devices.
In iOS 16 the credentials created using this approach will create a copyable passkey. This credential will be synced to all of the Apple devices belonging to a user, so credential registration is only necessary one time.
Application demo
Before we dive into the implementation guide, let’s first view an example of what we will be creating. The gif below demonstrates this scenario using our demo application.
Invoking the WebAuthn registration ceremony
To get started let’s begin by refreshing ourselves on how to register a new credential with WebAuthn. Let’s start with this basic account security screen. Here a user is given a list of their credentials, and a button that will begin the WebAuthn ceremony, allowing a user to add a new credential. In this sample the titles reflect that our application is only allowing for their trusted devices.
Take a look at Figure 1 to see an example of an account security screen for adding a credential.
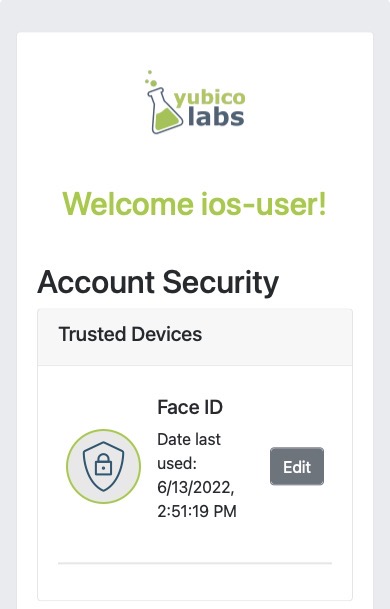
Figure 1
Once the user is ready to register a new credential, the “Add Face ID” button is clicked.
Figure 2 shows the modal that appears on the user’s screen asking if they wish to use Face ID.
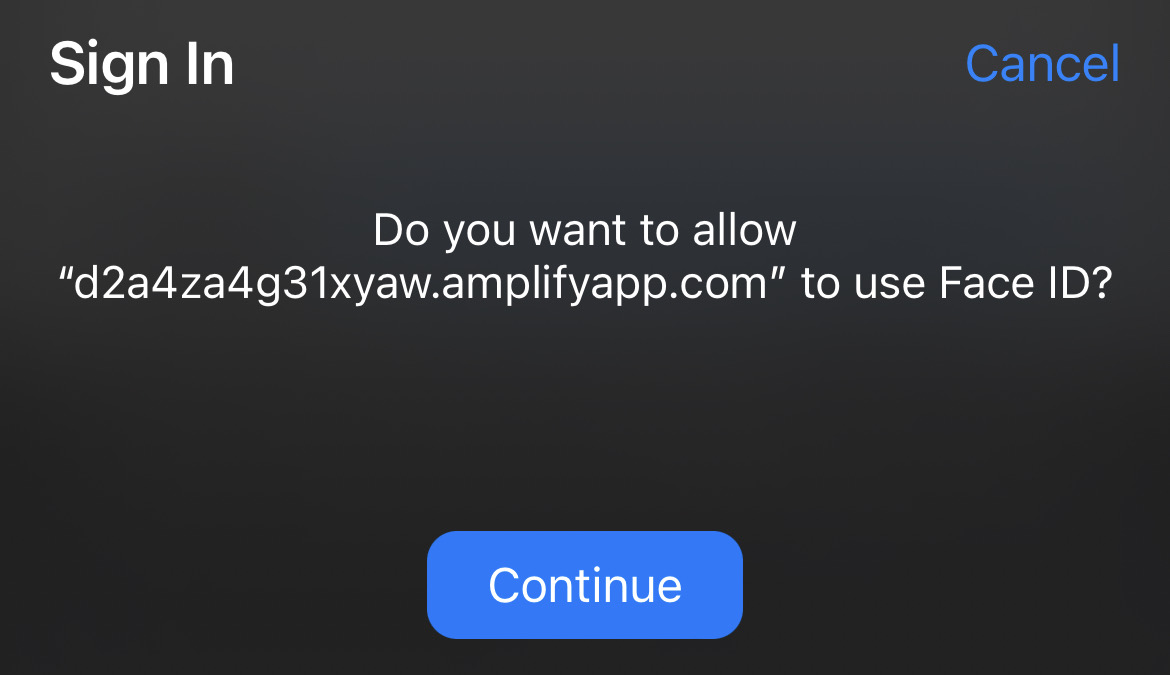
Figure 2
This is different from the standard modal pop-ups. Previously the user would have been asked if they wanted to use Face ID, with an option to register a security key. Instead they are now only given the option to register using Face ID(an example of the default flow can be seen on this page).
Behind the scenes, the button is triggering a call to your relying party in order to retrieve the PublicKeyCreationOptions that are used to create the new credential.
Figure 3 demonstrates an example of the PublicKeyCreationOptions that were used in the ceremony above.
{
  "publicKey": {
      "rp": {
          "name": "WebAuthn Starter Kit",
          "id": "d2a4za4g31xyaw.amplifyapp.com/"
      },
      "user": {
          "name": "ios-demo",
          "displayName": "ios-demo",
          "id": "xxxxxxxx-xxxx-xxxx-xxxx-xxxxxxxxxxxx"
      },
      "challenge": "XXXXXXXXXXXXXXXXXXXXXXXXXXXXXXXXXXXXXXXXXXX",
      "pubKeyCredParams": [***],
      "excludeCredentials": [
          {
              "type": "public-key",
              "id": "XXXXXXXXXXXXXXXXXXXXXXXXXXXXX-XXXXXXXXXXXXXXXXXXXXX-XXXXXXXXXXXX"
          }
      ],
      "authenticatorSelection": {
          "authenticatorAttachment": "platform",
          "residentKey": "preferred",
          "userVerification": "preferred"
      },
      "attestation": "direct",
      "extensions": {
          "credProps": true
      }
  }
}
Figure 3
While this sample looks very similar to the options that allow for both Face ID and security keys, the primary difference can be noted in line 25. The authenticatorSelection object in the PublicKeyCreationOptions contains a property titled authenticatorAttachment.
Setting authenticatorAttachment to platform will force the user to register their platform authenticator, in this case it’s Face ID. This behavior will remove the initial prompt that included an option for security keys. Instead Safari’s WebAuthn prompt will immediately ask a user to invoke Face ID, as seen in Figure 2.
More information on the authenticatorAttachment can be found in the authenticator attachment enumeration section of the WebAuthn specification.
Once the PublicKeyCreationOptions are sent back to your application, your application will pass the options into the navigator.credentials.create() method to begin the registration process.
Figure 4 demonstrates sample Javascript code used by your client application to ask the RP to begin a registration ceremony, using the PublicKeyCreationOptions to invoke the create() API, and if successful send the response back to the RP.
async function registerNewCredential() {
  try {
    // Begin the registration, requesting the RP use a specific authenticatorAttachment
    const startRegistrationResponse = await axios.post(
      "/users/credentials/fido2/register"
    );
    // Create options sent by the RP
    const publicKey = {
      publicKey:
        startRegistrationResponse.data.publicKeyCredentialCreationOptions,
    };
    const { requestId } = startRegistrationResponse.data;

    const makeCredentialResponse = await navigator.credentials.create(publicKey.publicKey);

    const challengeResponse = {
      credential: makeCredentialResponse,
      requestId,
    };

    // Send the challenge response back to the RP
    await axios.post(
      "/users/credentials/fido2/register/finish",
      challengeResponse
    );

  } catch(e) {
    console.error("Something went wrong: ", error)
  }
}
Figure 4
Another feature you may want to leverage is removing the ‘Add Face ID now’ button once Face ID has successfully been added. Continuing to show the button may confuse users who may try and register their Face ID multiple times. Our guidance is to leverage a cookie, or flag in local storage to indicate to the application that Face ID has been registered using the browser. You will want to avoid storing the public key itself, these flags are only meant to act as indicators, and not a mechanism to bypass the WebAuthn ceremony.
Our guidance is to only store a flag indicating that a platform authenticator has been registered, and the credential ID. The credential ID allows the indicator to be reset if the user removes the platform authenticator that matches the credential ID.
Figure 5 demonstrates a sample of how we indicate that Face ID has been registered.

Figure 5
This flow will allow your user to register to your application using only Face ID. Click below to return to the iOS and Safari development guide for additional implementation guidance.