EJBCA Login with PIV Keys
Logging into the EJBCA Adminweb is only allowed with certificate authentication. Here is a set of instructions on how to store a certificate on a YubiKey and use it to login to EJBCA Adminweb.
Prerequisites
-
Linux operating system. Tested on Ubuntu 18.04 but should work with earlier versions as well.
-
FireFox web browser. Tested with FireFox 63 64-bit but should work with earlier versions as well.
Quick Instructions
-
Generate a key pair, either by EJBCA or on the YubiKey.
-
EJBCA issues a certificate for the public key.
-
Import the EJBCA issued certificate into the YubiKey (if the key pair was generated by EJBCA, the private key too needs to be imported into the YubiKey).
-
Add the certificate serial number as a member of an Administrator Role on EJBCA.
-
Add
libykcs11.somodule to FireFox as a security device.
See bellow for detailed instructions of each action.
Detailed Instructions
Key Pair Generated by EJBCA
-
On EJBCA Adminweb, create an end entity. Set Token = P12 file.
-
From EJBCA Public Web or EJBCA RA Web, download the p12 file. You will need the end entity username and password.
-
Using the YubiKey Manager or the Yubico PIV Tool, import the p12 file into the YubiKey PIV slot
9a.-
With the YubiKey Manager
-
Go to Applications → PIV
-
Click Configure Certificates
-
Click Import
-
Choose the p12 file. You will be required to enter the password to the p12 file and then the YubiKey PIV Management Key. The certificate details should then be displayed in the Authentication tab.
-
-
With Yubico PIV Tool
yubico-piv-tool -s 9a -i path/to/file.p12 -K PKCS12 -a import-key -a import-certificate
You will be prompted for the p12 file password.
-
Key Pair Generated on the YubiKey
-
On EJBCA Adminweb create an end entity. Set Token = User Generated.
-
Using the YubiKey Manager or the Yubico PIV Tool, generate a key pair and a certificate request.
-
With YubiKey Manager
-
Go to Applications → PIV
-
Click Configure Certificates
-
Click Generate
-
Choose Certificate Signing Request (CSR). Click Next
-
Choose the desired key algorithm and click Next.
-
Write the desired subject name; this is equivalent to the Common Name (CN) on the SubjectDN. Click Next.
-
Click Generate and store the certificate request on the file system. You will be required to enter the YubiKey PIV Management Key and then the YubiKey PIV PIN. A Success message should be displayed afterwards.
-
-
With Yubico PIV Tool
yubico-piv-tool -s 9a -A RSA2048 -a generate
yubico-piv-tool -s 9a -S '/CN=foo/OU=test/O=example.com/' -a verify -a request
You will be prompted for the YubiKey PIV PIN.
-
-
On EJBCA Public Web or EJBCA RA Web, submit the certificate request generated in the previous step and get a certificate. You will need the username and password of the end entity created in step
1. -
Using the YubiKey Manager or the Yubico PIV Tool, import the certificate file into the YubiKey PIV slot
9a. Note that the certificate file must contain only one certificate (aka. not a full certificate chain).-
With YubiKey Manager
-
Go to Applications → PIV
-
Click Configure Certificates
-
Click Import
-
Choose the certificate file. You will be required to enter the YubiKey PIV Management Key. A Success message should be displayed afterwards and the certificate details should then be displayed in the Authentication tab.
-
-
With Yubico PIV Tool
yubico-piv-tool -s 9a -a import-certificate -i path/to/certificate.pem
-
Add Administrator on EJBCA
-
Note the certificate serial number of the intended administrator.
-
On EJBCA Adminweb, go to Administrator Roles.
-
Choose the role to add the administrator to or create a new role. Click on Members of that role.
-
Set the parameters:
-
Match with: X509: Certificate serial number (Recommended)
-
CA: The name of the CA that issued the administrator certificate.
-
Match Value: The certificate serial number.
-
Description: Free text describing the administrator
-
-
Click "Add".
Add YKCS11 Security Device in FireFox
-
Start FireFox
-
Add
libykcs11.somodule (installed when installingyubico-piv-tool) to FireFox as a security device. When the module is added, the YubiKey should be displayed as shown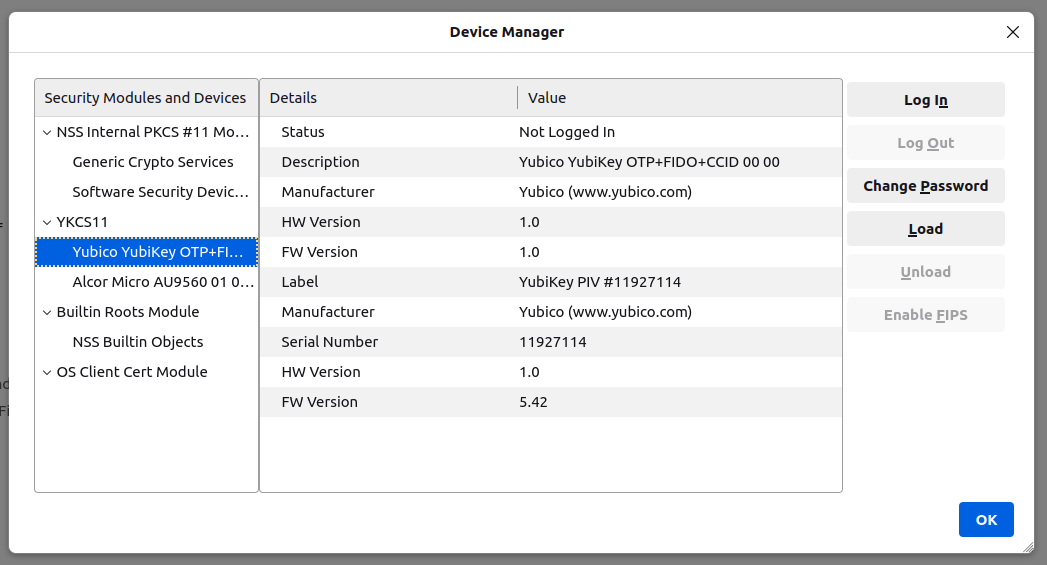
-
Go to EJBCA Adminweb. A popup window will prompt for the PIN to the YubiKey PIV slot. After entering the pin, a new popup window will be displayed containing a drop-down menu listing the certificates that can be used to login to EJBCA. Choose the certificate that was imported into the YubiKey and click
OK. -
Login complete.
Possible Errors
PIV Application on YubiKey Manager Shows Error
On the YubiKey Manager, if clicking Applications → PIV causes an error, it is most likely because the CCID interface of the YubiKey is not enabled. By default, all interfaces, including the CCID interface, are enabled.
To enable the CCID interface, on the YubiKey Manager:
-
Go to Interfaces
-
Check CCID (Smart Card) and click Save Interfaces. You will be required to remove and re-insert the YubiKey.
opensc-pkcs11.so Module Would not Load
If the libykcs11.so module would not load, make sure that the library is in the LD_LIBRARY_PATH. Assuming that yubico-piv-tool was installed in the default location (/usr/local/lib/), the environment variable can be set to LD_LIBRARY_PATH=$LD_LIBRARY_PATH:/usr/local/lib. Relaunch FireFox afterwards.
YubiKey is not Recognized as a Smartcard
If the YubiKey does not show as a smartcard recognized by FireFox Security Devices as shown in the picture above, it is most likely because the YubiKey is not accessible by YKCS11. To see if the YubiKey is accessible, run the following command in a terminal
pcsc_scan
The output should be something like
+
pcsc_scan
PC/SC device scanner
V 1.5.2 (c) 2001-2017, Ludovic Rousseau <ludovic.rousseau@free.fr>
Using reader plug'n play mechanism
Scanning present readers...
0: Yubico Yubikey 4 OTP+U2F+CCID 00 00

Thu Dec 13 15:58:00 2018
 Reader 0: Yubico Yubikey 4 OTP+U2F+CCID 00 00
  Card state: Card inserted,
  ATR: 3B F8 13 00 00 81 31 FE 15 59 75 62 69 6B 65 79 34 D4

ATR: 3B F8 13 00 00 81 31 FE 15 59 75 62 69 6B 65 79 34 D4
+ TS = 3B --> Direct Convention
+ T0 = F8, Y(1): 1111, K: 8 (historical bytes)
  TA(1) = 13 --> Fi=372, Di=4, 93 cycles/ETU
    43010 bits/s at 4 MHz, fMax for Fi = 5 MHz => 53763 bits/s
  TB(1) = 00 --> VPP is not electrically connected
  TC(1) = 00 --> Extra guard time: 0
  TD(1) = 81 --> Y(i+1) = 1000, Protocol T = 1
-----
  TD(2) = 31 --> Y(i+1) = 0011, Protocol T = 1
-----
  TA(3) = FE --> IFSC: 254
  TB(3) = 15 --> Block Waiting Integer: 1 - Character Waiting Integer: 5
+ Historical bytes: 59 75 62 69 6B 65 79 34
  Category indicator byte: 59 (proprietary format)
+ TCK = D4 (correct checksum)

Possibly identified card (using /usr/share/pcsc/smartcard_list.txt):
3B F8 13 00 00 81 31 FE 15 59 75 62 69 6B 65 79 34 D4
    Yubico Yubikey 4 OTP+CCID
+
If you get something like the following instead
+
Cannot find a smart card reader. (0x8010002E)
Waiting for the first reader...
+
Then something is wrong.
EJBCA Adminweb not Accessible Anyway
If everything was completed without errors but the EJBCA Adminweb is still not accessible, check that:
-
The issuer CA is trusted by FireFox. See bellow for details.
-
The issuer CA is trusted by the application server of EJBCA. If the application server used is JBoss, there should be a
trustedCertEntryof that CA in theJBOSS_HOME/standalone/configuration/keystore/truststore.jksfile (default password ischangeit)
Issuer CA not Trusted by FireFox
The certificate of the CA that issued the administrator certificate needs to be listed as a trusted CA by FireFox. To see whether the CA is trusted by FireFox or not, go to FireFox Preferences → Privacy & Security → View Certificates… → Authorities and look for the issuer CA name. If it is there and there is no "untrusted" label next to it, then the CA is trusted.
If the issuer CA is not in the list of trusted authorities by FireFox, do the following:
-
Go to EJBCA Public Web → Fetch CA Certificates or EJBCA RA Web → CA Certificates and CRLs.
-
Find the name of the issuer CA and click to download it to FireFox.
-
In the popup window, check "Trust this CA to identify websites." and click OK.
"Authorization Denied" Error Message on EJBCA Adminweb
If an "Authorization Denied" error message is displayed on the browser, then the login in fact had succeeded, but the certificate in the YubiKey is not a member of any Administrator Roles. See above for instructions on how to add an administrator to an Administrator Role on EJBCA.